
I can think of very few things that I enjoy as much as spending time with my 8 year-old daughter building robots. (Assembling Lego Star Wars kits admittedly finishes a close second.) We both like to build our bots from scratch, but when we lack time, motivation, and/or my full attention, a kit is often more than enough for us to get our fix. Today was one of those days, and I had previously purchased the 14-in-1 Educational Solar Robot Kit by OWI for such an occasion.
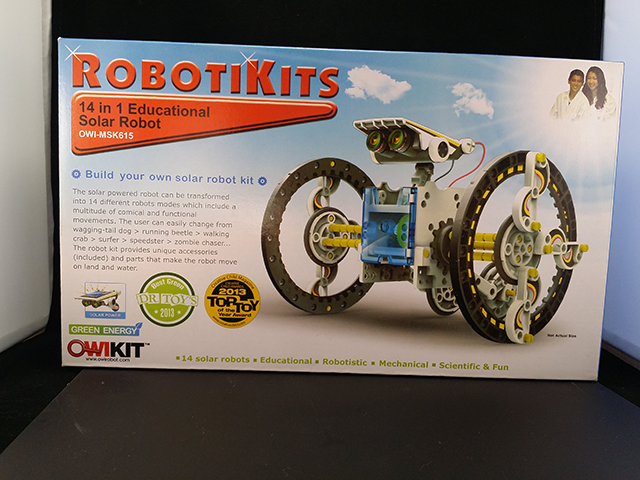
OWI Solar Kit Box – Front
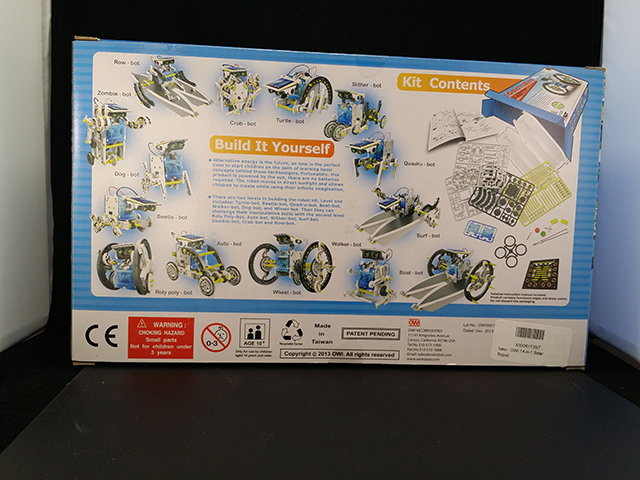
OWI Solar Kit Box – Back
I thought that I was unfamiliar with OWI Incorporated and their robot kits, but after browsing their product page, I now realize that I had previously seen most of their robots, many online and a few in person. And the more I read about OWI the company, the more I like them. It turns out their kits have a not-so-hidden agenda beyond that of sparking kids’ interest in robotics. The following is from their About Us page:
… if anything is certain about the future, it is that renewable energy sources and green technologies will play a major role in our children’s lives for everything from using wind or solar power generated on site in their homes, to driving alternative fuel vehicles, or embarking on a career in one of America’s future “green” technology jobs.
And specifically in regards to their robot kits, they
…are being used to teach children about alternative energy concepts like solar, wind, and “green” vehicles, in a fun, hands-on way.
While I am a big fan of green energy, and in particular solar power, I’d be lying if I said it played any role in my decision to pick up this kit. What did influence me was the fact that you can make 14 different robots with this kit including a dog, crab, turtle, walker and even zombie! The fact that the Amazon.com reviews were generally very good sealed the deal.
After a brief inspection of the outside of the box to determine with robot was going to be our first build (the walker), my minion and I tore open the packaging to find 4 plastic “sheets” of parts that the instruction manual suggested using a diagonal cutter to separate. Although I didn’t say it out loud, it became apparent to me immediately that we wouldn’t be finishing any robots in the 90 minutes or so that we had to work.
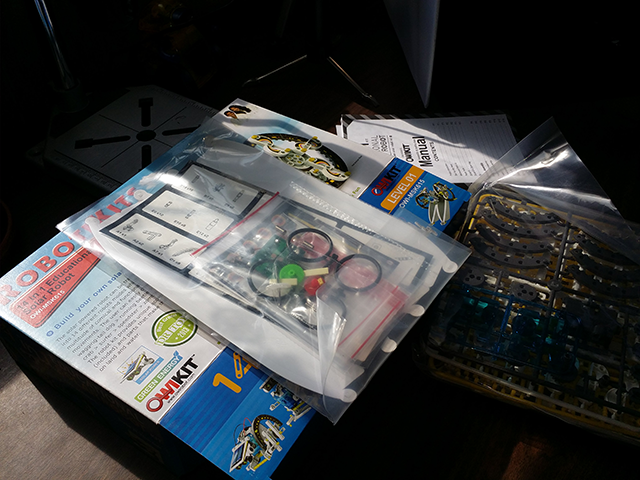
What’s Inside the Box
Following some instructions on how to use the cutters, my daughter and I soon hit our pace preparing the pieces. The kit includes several sealable bags with stickers to label which parts they should hold, making organizing a no-brainer. As she freed the pieces from their plastic constraints, I used my Dremel to grind down the small plastic nubs the cutters left behind. Everything was going smoothly until we found a piece that we couldn’t find a home for …

Cutting and Grinding
So, the instruction booklet is obviously not written by a person whose mother tongue is English. In all fairness, the diagrams so far have been very good, and the text is ultimately very understandable. I don’t foresee additional problems with the instructions, but we were initially confused by the fact that not all of the parts were meant to be reconfigurable. Some parts were meant to be assembled into structures that were not meant to be taken apart again, specifically the head and torso/gearbox. This explained why for some pieces there was no storage bag to which they were assigned.
Armed with this new knowledge we decided to tackle the two static parts before continuing our disassembly. First up, the head.
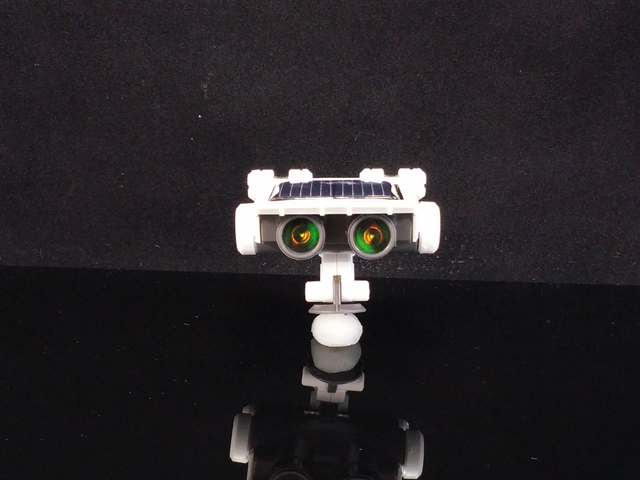
Head – Front
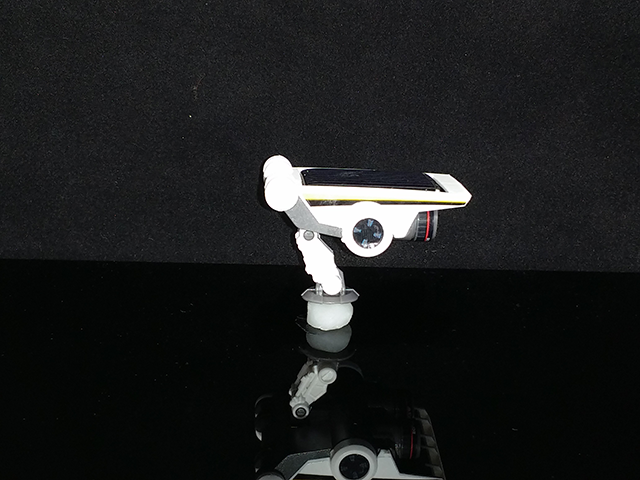
Head – Side
The head’s sole purpose beyond aesthetics is to house the solar panel that powers the robot. Although the output is not listed anywhere in the documentation, the panel appears identical to the 75 mA panels that ship with many of OWI’s other solar kits. Springs are connected to the panel’s leads, serving as a connection point for the motor leads. I actually like this idea a lot. The wires from the motor have tiny ring-type connectors on them that slide easily between the coils of the springs yet seem to fit snug enough that they won’t fall out easily. I may change my mind about this once we’ve actually built something. I also like that the polarity is marked on the caps that cover the springs. This provided an opportunity for us to review polarity and to see it in action as we connected the motor to the head to test our progress.
There’s not much else to say about the head. The tiny stickers were difficult for me to apply with my relatively fat fingers, but my assistant had no problems. They look good, but I have to wonder about their durability. A better adhesive solution may be necessary before long.
And that wraps up our first day with the OWI 14-in-1 Educational Solar Robot Kit. It’s hard to say when we’ll find time for day 2, but when we do, I’ll be sure to post our results here.
9/24/14 Update: Read about Day 2.